Print File Help
Quick references to help you get your files ready for print
1. Preparing a file for printing: crop marks and bleed
If your design has colour, photos, or shapes that go right to the edge of the page, the file should usually include bleed. Bleed is extra image area outside the final trim size so the print can be cut cleanly without leaving white edges.
What customers should know
- Bleed is usually 0.125" (3 mm) beyond each edge of the final finished size.
- Crop marks show where the printed piece should be cut.
- If the background does not go to the edge, bleed may not be needed.
- If the design goes edge-to-edge, bleed should be included before exporting.
How to confirm bleed is included
- Open the PDF and zoom in near the edges.
- Check whether the background, images, or colour blocks extend slightly past the crop marks.
- If the artwork stops exactly at the trim line, the file probably does not include bleed.
- If unsure, send the file to staff for review before printing.
2. Supported file types and how to export
For print work, the best file type is usually PDF Print. Canva’s help center says PDF Print is intended for printing at higher resolution and supports bleed, crop marks, and RGB/CMYK profile selection.
Recommended file types
- Best: PDF Print
- Also accepted in many cases: JPG, PNG, TIFF
- Editable/source files may help: PSD or Canva link/file when available
- Less ideal for print: low-resolution screenshots, compressed social media files, web-only PDFs
How to export from Photoshop, PowerPoint, Illustrator
- Open the final document and confirm the size is correct.
- Check the colour mode before exporting.
- Go to File > Save As and choose Adobe PDF.
- Choose an appropriate PDF preset for print.
- Make sure the colour profile is embedded if available.

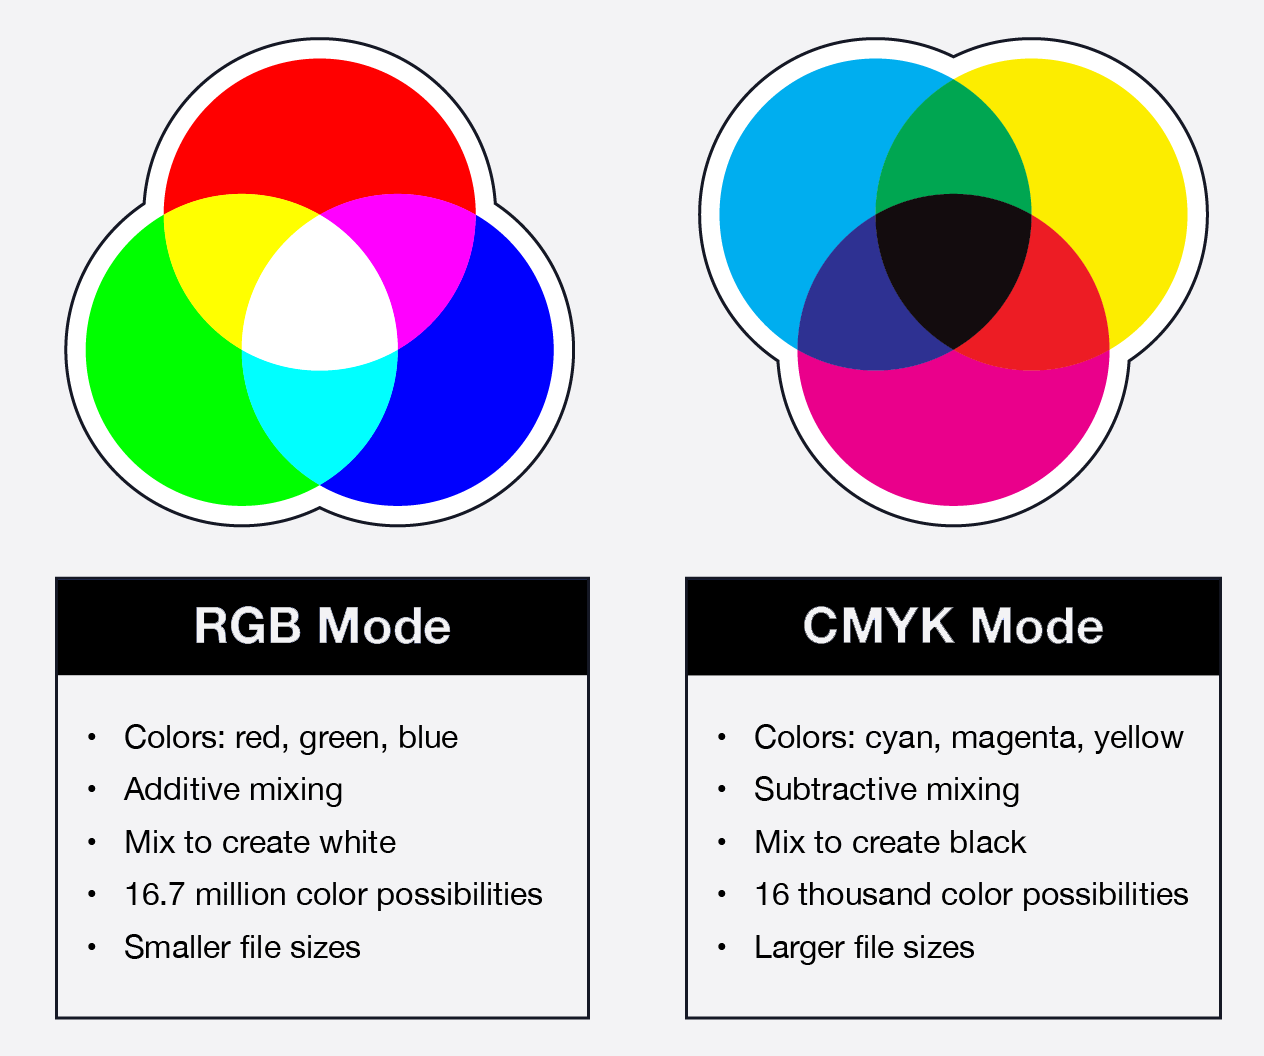
3. Colour prep: RGB, CMYK, and print expectations
RGB (Red, Green, Blue) is an additive color model used for digital screens, creating bright colors by adding light, while CMYK (Cyan, Magenta, Yellow, Key/Black) is a subtractive model used for printing, creating color by absorbing light using inks.
RGB has a wider, more vibrant gamut, while CMYK is optimized for physical production (printing)
Key Differences Between RGB and CMYK Primaries:
RGB (Additive): Colors start black and add red, green, and blue light to create white. Used for screens (TVs, phones, monitors).
CMYK (Subtractive): Colors start white (paper) and subtract light using cyan, magenta, and yellow ink to create black (technically dark brown, hence black "Key" ink is added).
RGB: Offers a larger, more vibrant spectrum, ideal for digital graphics, as seen in this Noun Project blog post.
CMYK: Has a more limited, smaller spectrum, resulting in duller or less saturated colors compared to what is seen on screen.
Primary Colors:
RGB: Red, Green, Blue.
CMYK: Cyan, Magenta, Yellow, Black (Key).
Usage:
- RGB: Digital design, web design, photography.
- CMYK: Physical printing (magazines, business cards, brochures).
Why They Do Not Match
Because RGB represents light and CMYK represents ink, converting from RGB to CMYK often results in a loss of vibrancy, as CMYK cannot reproduce the same, high- intensity brightness that lights can generate
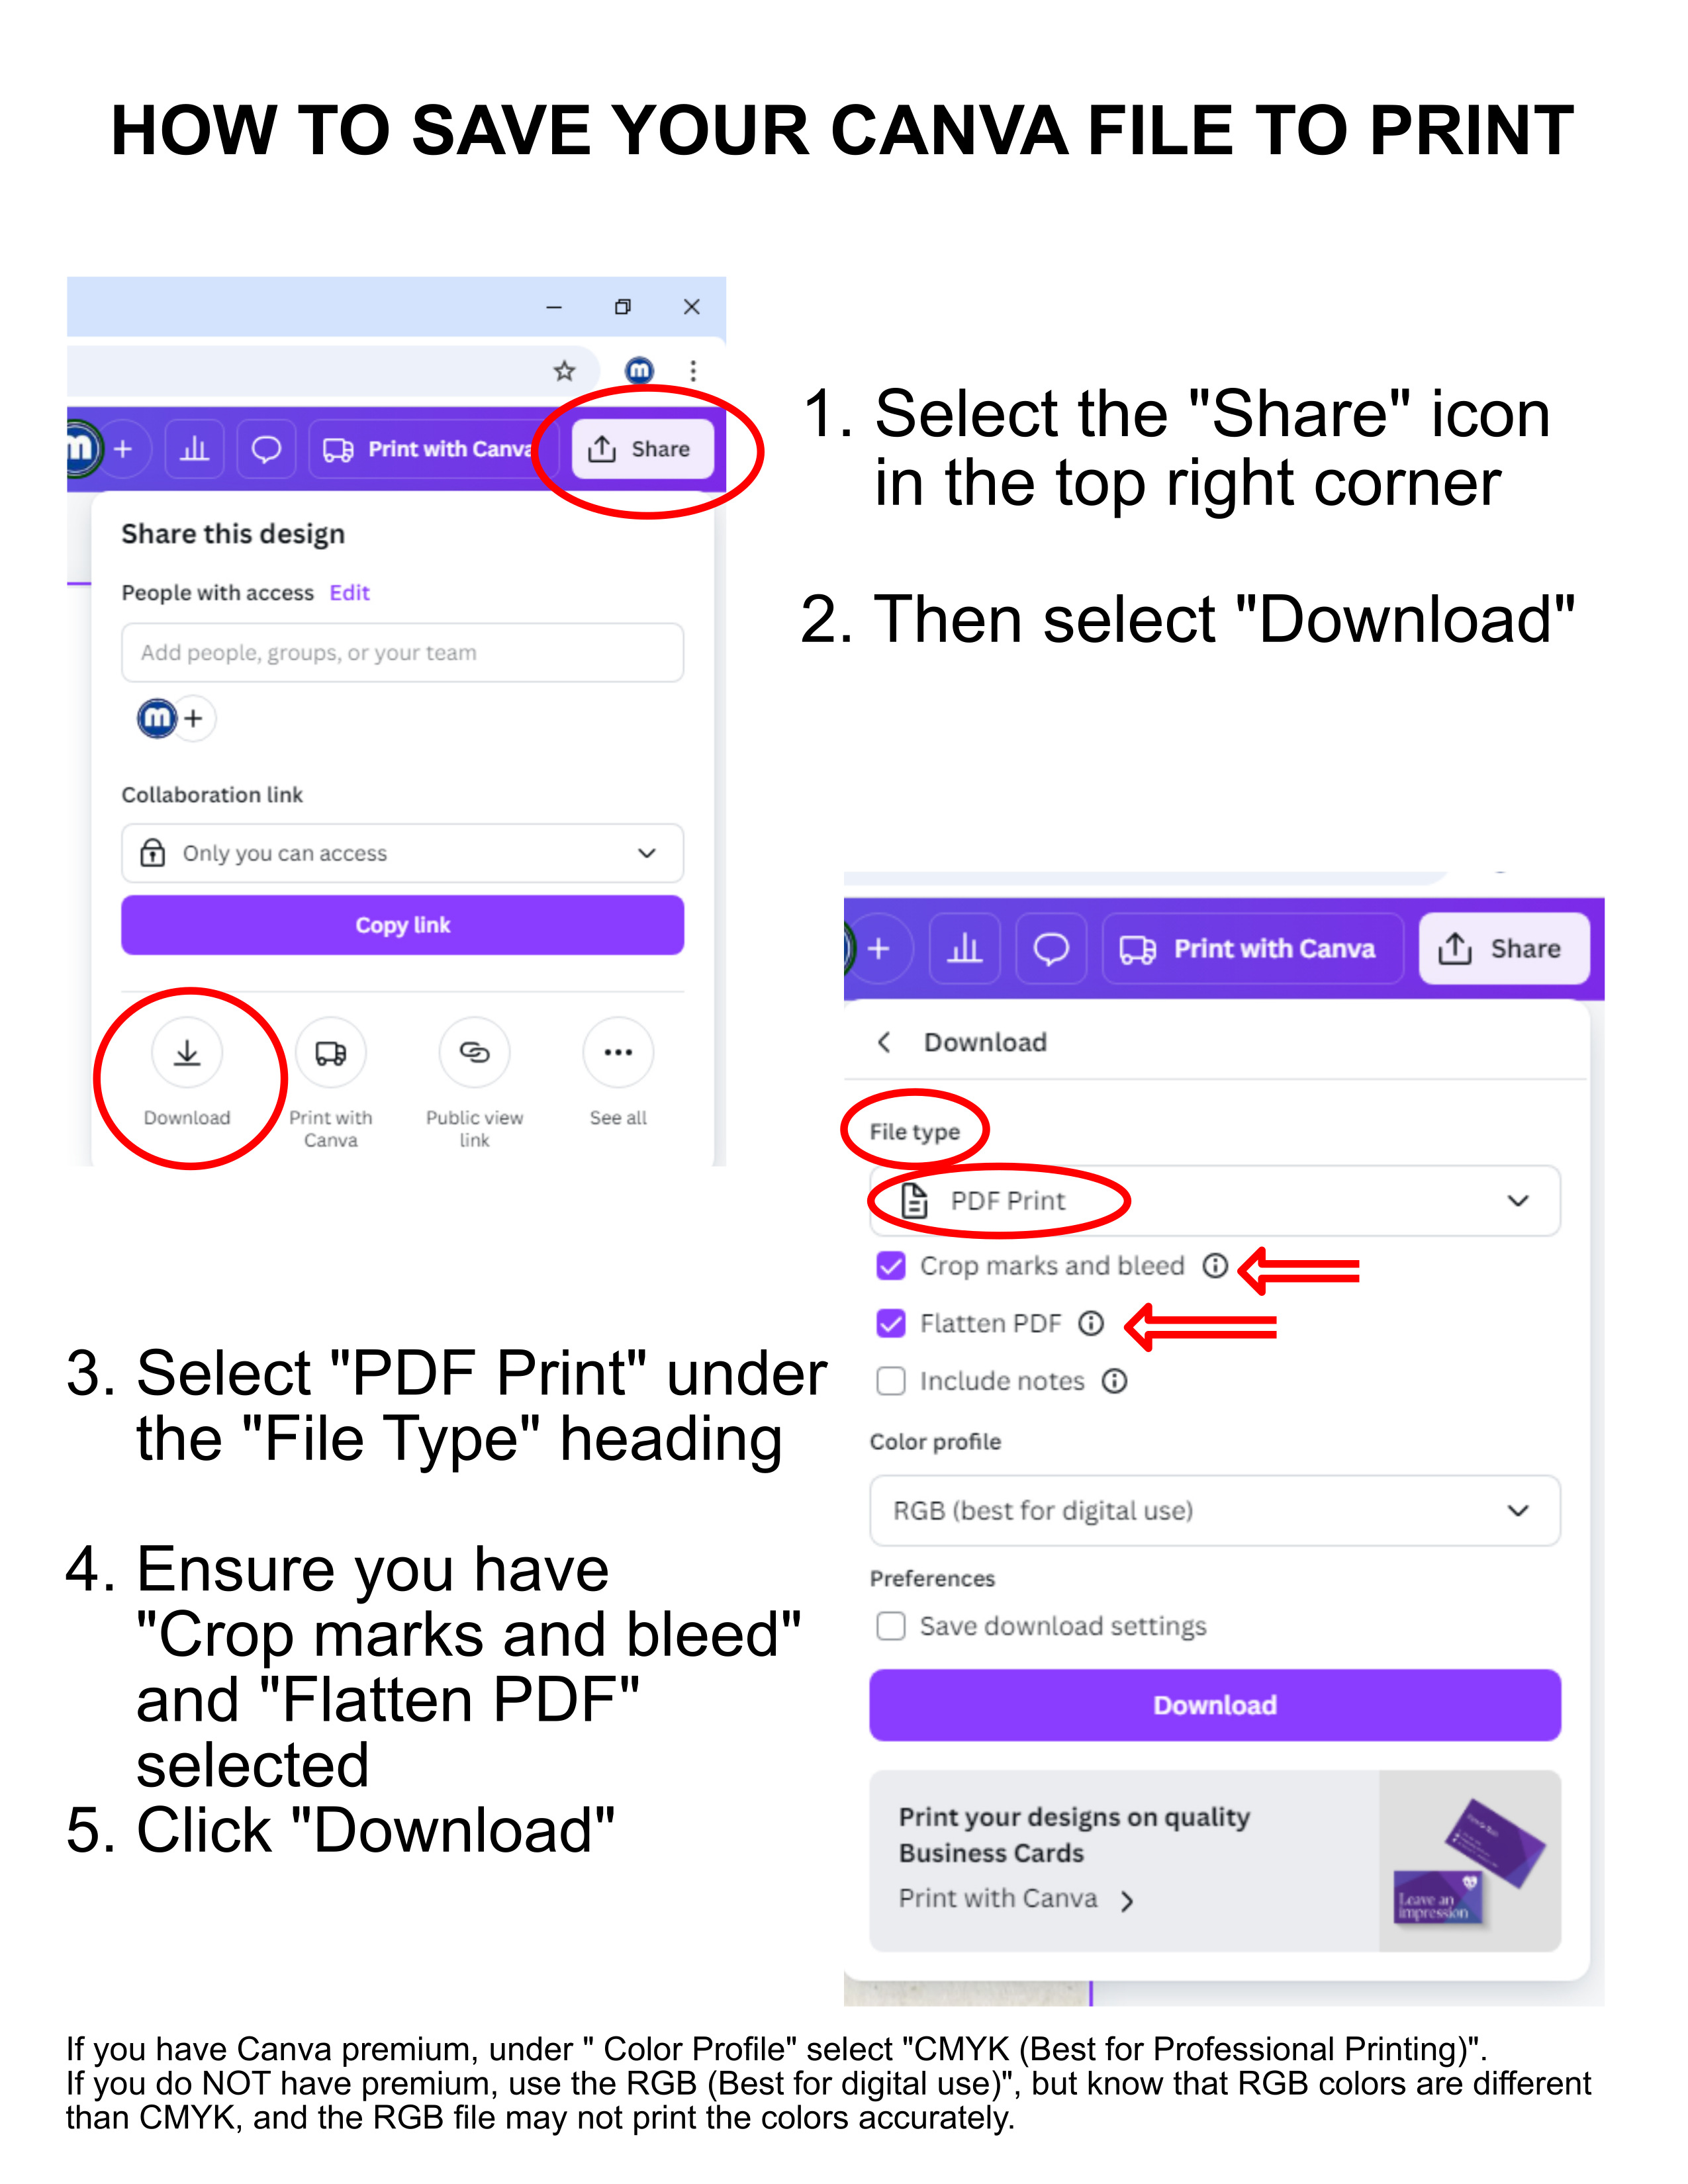
4. How to export Canva designs for printing
Canva’s official help docs say that for printing you should generally choose PDF Print, and enable Crop marks and bleed when needed. Canva also notes that PDF Print supports higher resolution and a colour profile choice for print workflows.
Step-by-step
- Open the finished design in Canva.
- Turn on guides/margins/bleed while reviewing the file if needed. Canva provides page view tools for this.
- Click Share icon in the top right corner.
- Click Download.
- Select PDF Print under the File Type heading.
- Ensure you have Crop marks and bleed and Flatten PDF selected.
- With Canva premium, under Color Profile select CMYK (Best for Professional Printing)
Without Canva premium select RGB (Note: RGB colors are different than CMYK) - Download the PDF and review it before sending.